I started rooting fig cuttings in 2020. Everything was shut down, social life was on pause, and I needed a hobby, so why not? I scoured the internet, read gardening forum posts and watched YouTube videos on everyone’s “guaranteed-to-root” method. I quickly had close to 100 cuttings rooting that winter. What I found the hard way though was that not all methods are truly “guaranteed”. A lot depends on your environment and the way you grow for what will work best for you.
After experimenting with different approaches, I concluded that the tried and true direct plant method that goes back to the beginning of time for rooting is best for most. Why try to reinvent the wheel as they say, right? The other trick that helps to maintain proper moisture levels to stimulate rooting is to bag the pot. This method seems to work in the majority of environments, is simple, and low maintenance. So, I am happy to share it with you today. Happy growing! 😊
Treepot Pops (Bagged Direct Plant Method)
SHORT VERSION:
Stick prepared cutting in a pot with moistened rooting mix, and bag the pot until rooted. Keep in an ambiently warm area, preferably in the 70-80°F range.
That’s it!
Contents
» Click on a section to skip ahead if you like.
Supplies Needed
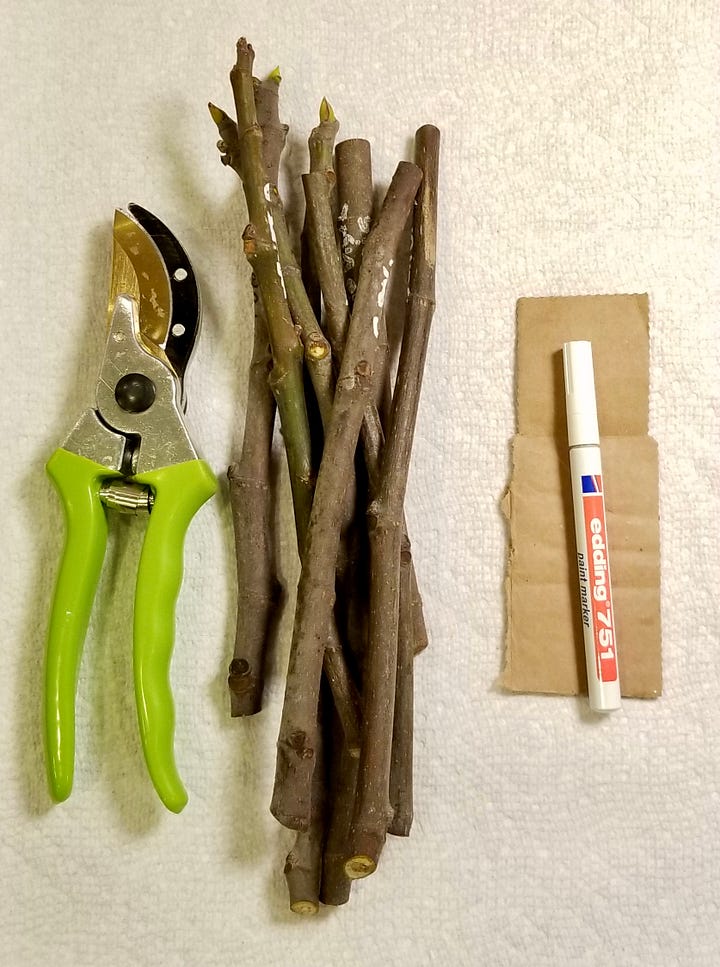
Oil based paint pen
Pruning shears
Semigloss interior paint. (I use a sample can, but any old paint laying around works, semigloss or gloss is preferred over satin or flat to repel water.)
Rooting mix:
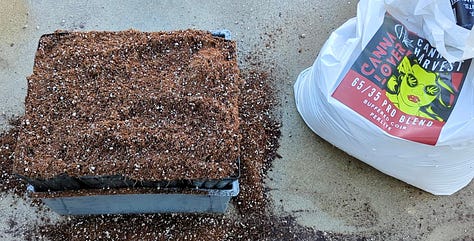
60/40 Coco coir & perlite, or
50/50 Peat & perlite, or
Equal parts peat, pumice/ perlite, & coarse vermiculite for a grittier mix.
4 x 9 Treepots, or equivalent
Plastic bags or produce bags from grocery store
Tray to set pots in and for bottom watering
Fertilizer: water soluble fertilizer with complete macro and micro nutrients; worm casting tea, or seaweed fertilizer. (I limit organics at this stage for indoor growing; do not use fish emulsion.)
Cutting Prep
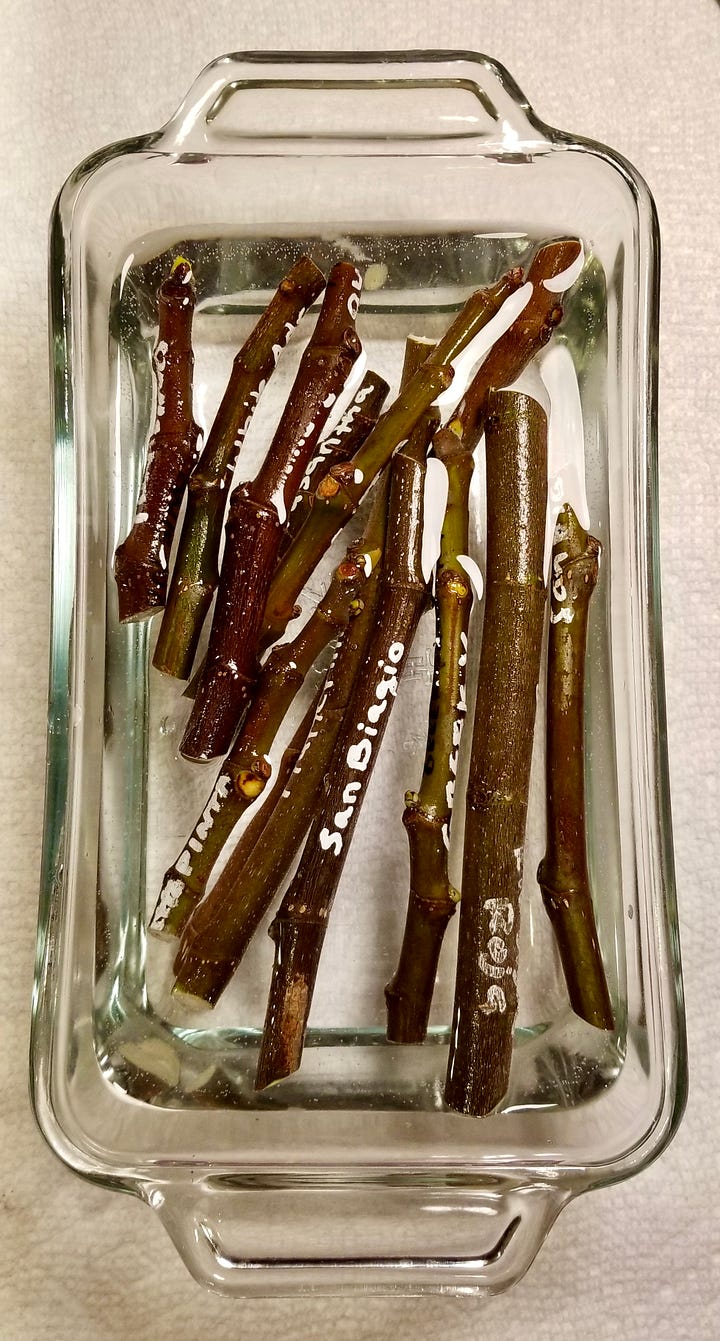
Clean cuttings if necessary. (I just use a bowl of cool water and a wet paper towel to wipe them down..)
Trim tops and bottoms of cuttings, unless an apical bud cutting, then just trim the bottom. Try to leave a minimum of 1/4” above and below nodes. I usually leave up to 1/2” on the bottom, the top can be a little longer if desired.
Cut to the desired length and node count. I prefer 4-5” long cuttings. Short or single-node cuttings can also root well.
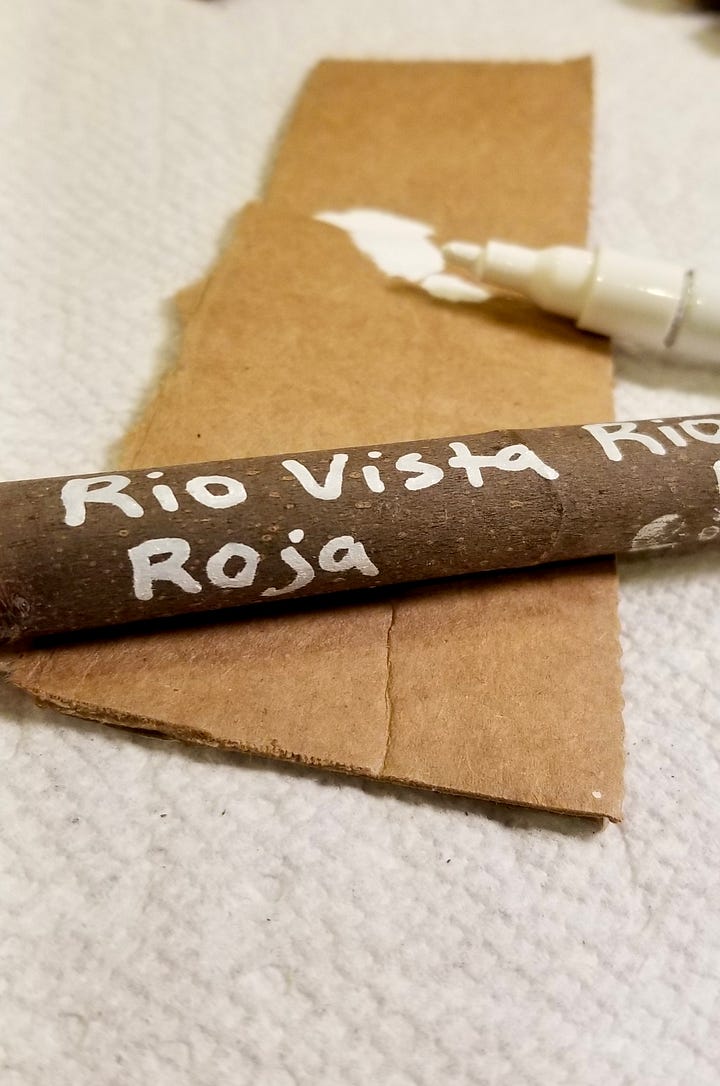
Write the name of the variety onto the cutting using an oil-based paint pen. Let the paint dry, usually takes less than an hour.
Soak cuttings in room temperature water overnight or 4-8 hours. A longer soak could be necessary for drier cuttings or ones that were stored for a long time.
Take cuttings out of water and let the tops dry off. You can place a damp towel over the lower half if they appear to be drying out too much. I usually wait a couple of hours before the next step.
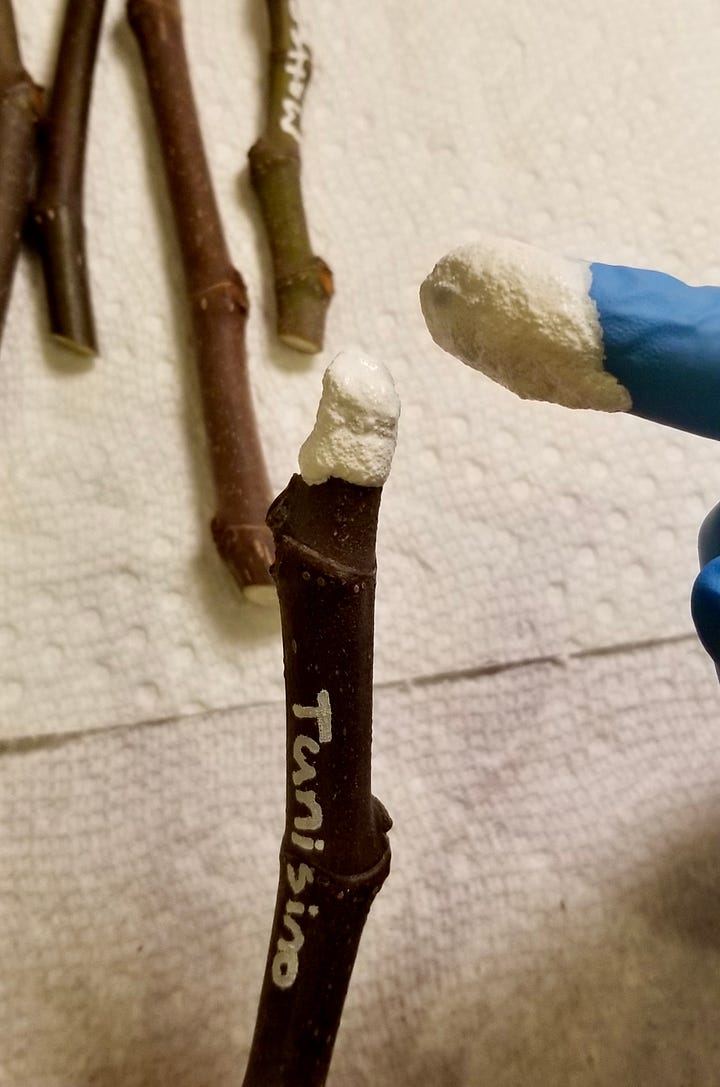
Seal dry, cut tops with semi-gloss interior paint. Let the paint dry. (Other things can be used instead of paint such as wood glue, grafting/pruning sealer, or wax.) I often leave the cuttings in a glass with a little water at the bottom while the paint dries and until I pot them to keep them hydrated.
Pot Prep
Label your pots with your paint pen to match your cuttings. Add your cutting source & the date if you like so you can track your rooting time. Alternatively, write it on a label to stick in or on your pot. Painter’s tape can also be used as a temporary pot label, just be aware that moisture can affect it.
Fill treepots to the top with the rooting mixture. Keep it light and fluffy, do not push it down into the pot.
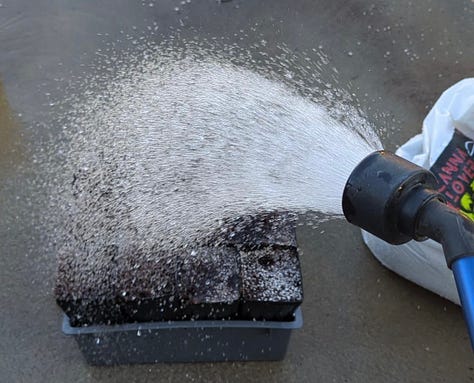
Water the rooting mix in the pot with a hose using a rain wand until run off. Do this a few times if your mix started dry. (Don’t use water straight from the hose, because it will come out in a gush and will push down the rooting mix compacting it more than we want.) Top off your pots with more rooting mix if needed & water again. Let drain.
»» Alternative: If you prefer to not use a hose, you can pre-moisten your mix before filling your pots. A good starting reference is about 5 parts mix to 1 part water. Start with less water, you can always add more as needed. Moisten it just to the point of it holding & clumping together when squeezed in your hand. Water should not squeeze out of it other than a few minor drips. Make sure to fluff it up to reaerate it, lightly add it to the pot to keep it fluffy and to not compact it in.Using a tool, make a hole in the rooting mix for your cutting. Keep the bottom of the hole at least 2-3” or higher from the bottom of the pot. Note that I make a hole larger than I need to fit the cutting. Do not push your cutting into the rooting mix instead of making a hole!

Potting Your Cuttings
Put the cutting into the hole you made, leave just one node out, and squish the mix at the top around the cutting to hold it in place. Note that I only squish the very top just around the cutting itself and I do not press the mix around the entire length of the cutting or all over the top. We want to keep our rooting mix fluffy and aerated in the pot and do not want to compact it down.
Thoroughly water in the cutting with the rain wand to run off*. Let drain completely. (I wait about 30 minutes or so, until the pot stops dripping from the bottom, before going to the next step.)
*You can skip this step if you pre-moistened your mix before putting it in the pot.A. FOR A SINGLE POT AND CUTTING:
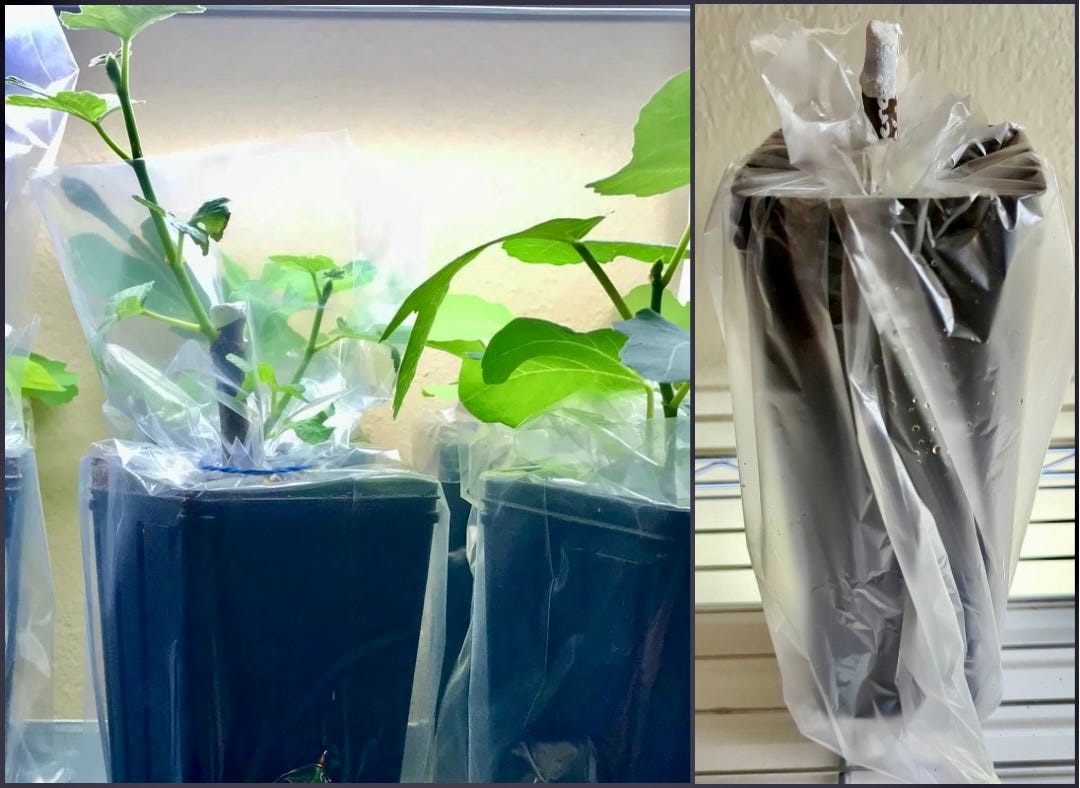
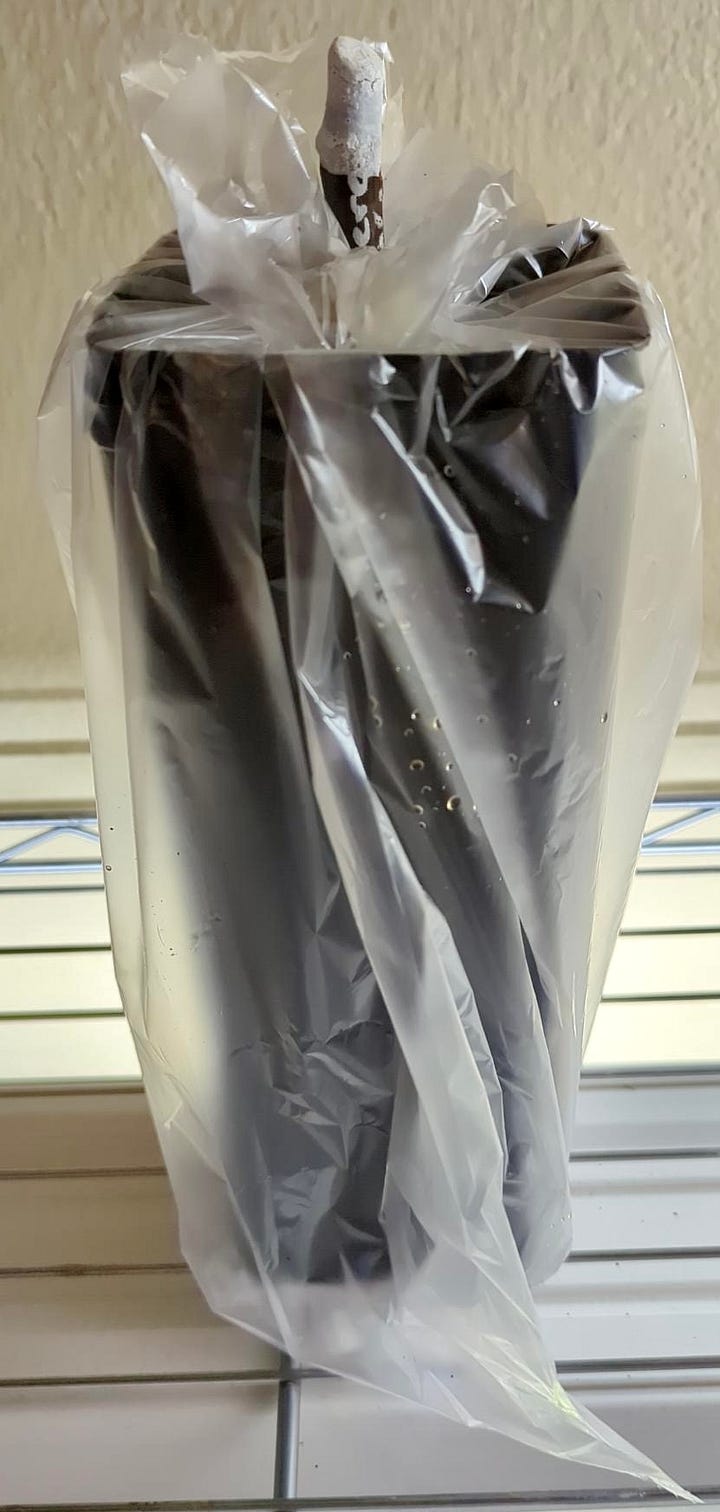
Place the prepared pot into a plastic produce bag. Tie the bag around the top of the cutting or use a rubber band to close the bag around the top of the cutting. I try to leave a little gap between the cutting and the bag. (You may need to leave out more than one node to have enough room to tie the bag with this method. Make sure your rooting mix is high enough in the pot.)
B. FOR A BULK AMOUNT OF CUTTINGS:
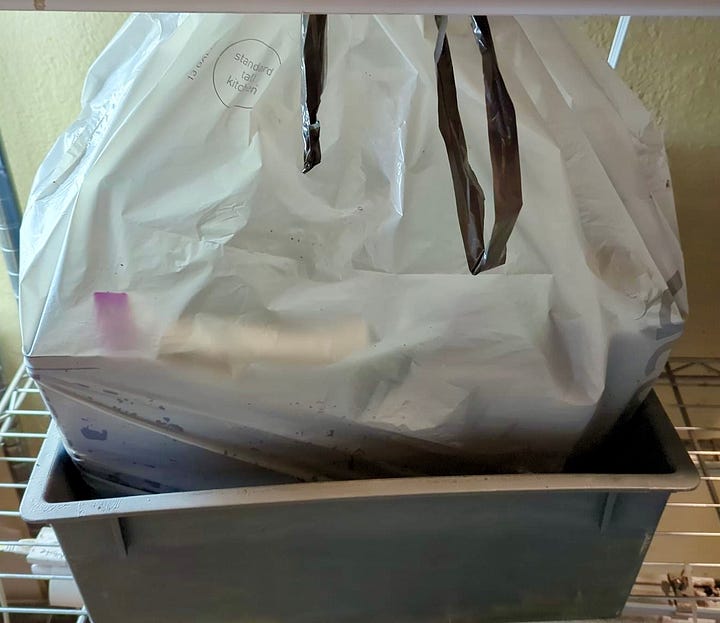
Use a large white kitchen trash bag with drawstrings to place multiple pots inside. Place the bag in your tray (or your tray in your bag depending on size) and set the prepared pots inside. Close the bag at the top with the drawstrings. It should not close tight but should leave about a 2” hole or larger at the top for air circulation. You will use this hole to control the humidity. Make sure the bag is not resting on the cuttings, but puff it out away from them.Leave the cuttings alone for about 4-6 weeks in a warm room, 72-78°F is ideal. If you see signs of growth, you can open the plastic bags to allow room for growing stems if needed. Any not showing signs of growth should remain bagged & tied.


After A Few Weeks
After about 4-6 weeks, the rooting mix will need some water added.
Don’t let the rooting mix dry out completely at any point. Start adding water to the pots after the initial 4 weeks. Feel the pot to check the weight first before adding any water, it should be noticeably lighter than when it was first bagged.
Just a little is needed in the beginning, about 1/8-1/4 cup around the edge of the pot. There should not be much runoff in the bottom of the bag, a tiny bit is okay, but drain it out if there is a larger quantity. You don’t want your pot to sit in water in the bag.
Rebag the pot if there are little to no signs of growth and wait another couple of weeks. If you see significant growth has started, you will want to check for water about once a week from here on out. You can start pulling down the bag or remove it completely depending on the amount of growth.
The bag is used to maintain consistent moisture to initiate rooting, so do not remove the bag completely until you are sure it has rooted.I use LED shop lights as grow lights and I turn them on once I see leaf growth. I leave them on about 12-14 hours a day.
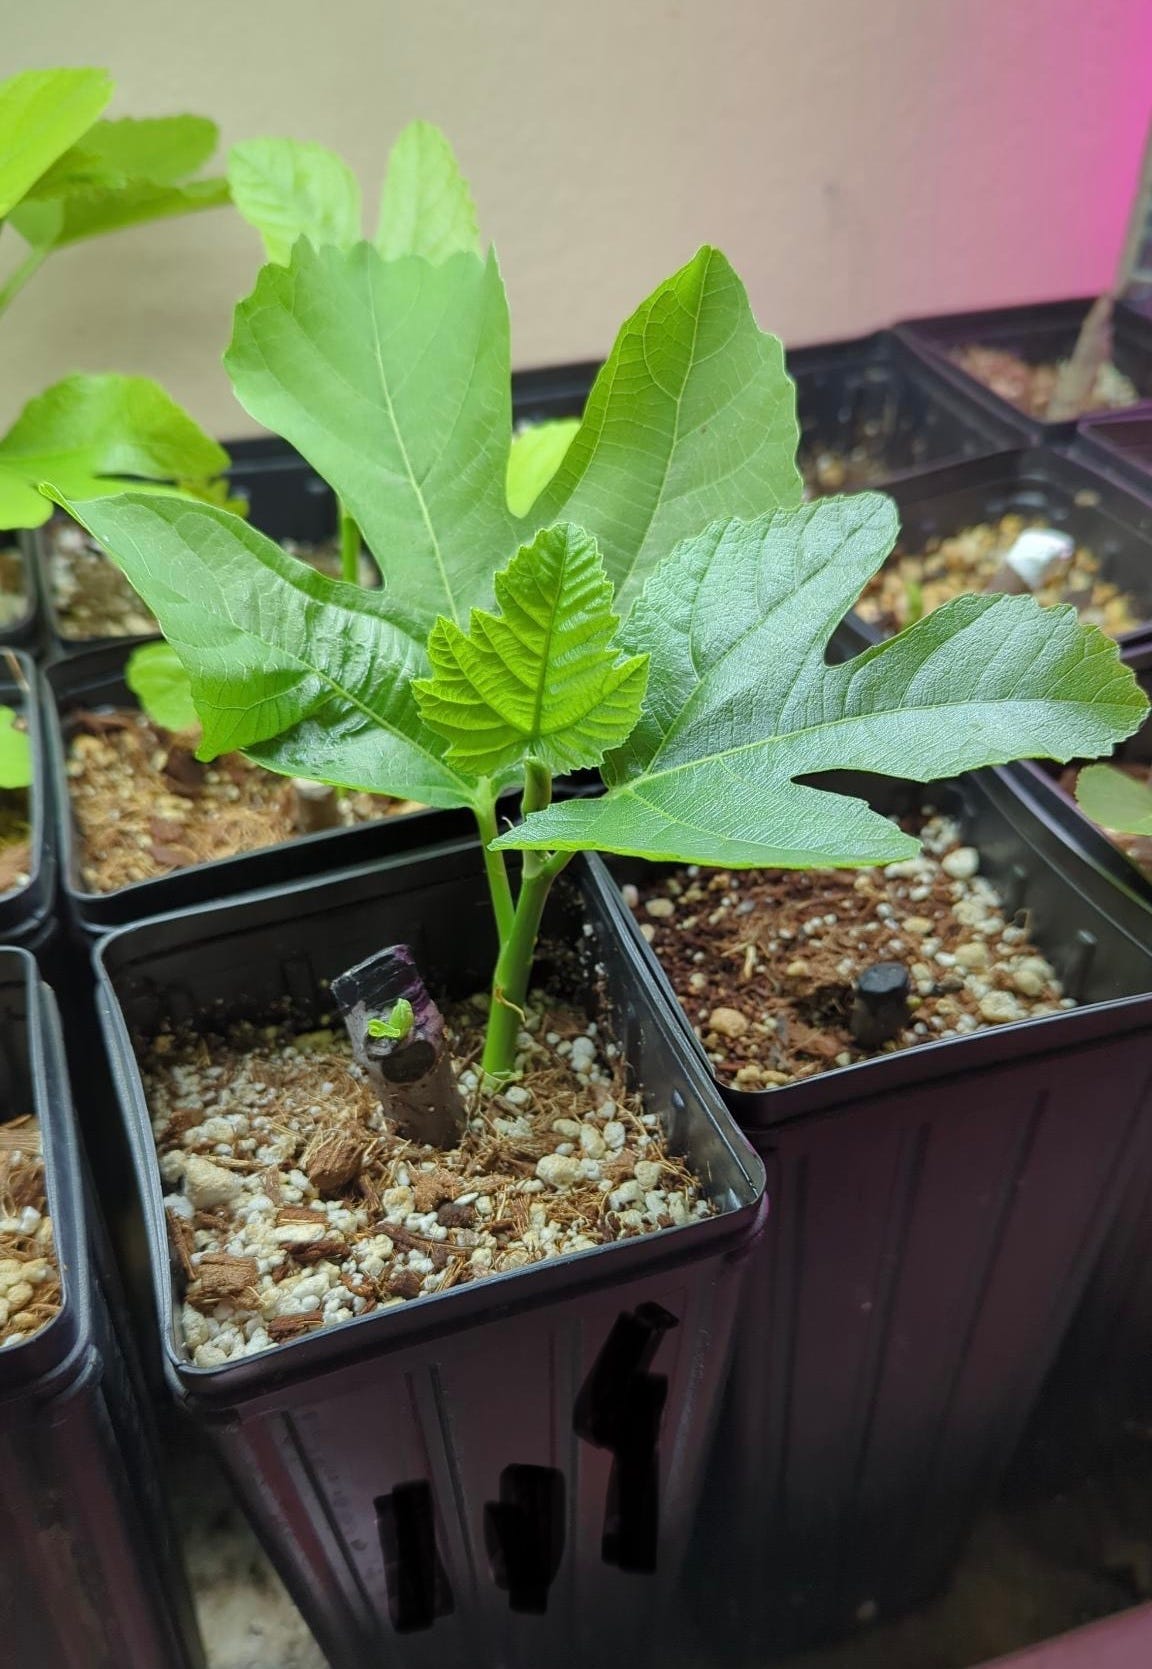
Once they start leafing out well and it is clear the cutting has roots, I remove the plastic bags completely and start bottom watering in my tray. I also start regular weak fertilization at this point about every other watering. You can use worm casting tea, seaweed extract, or a conventional chemical fertilizer at half of the houseplant dose. EM 1, LABS, fermented willow bark extract, or aloe vera can also be used to a limited degree diluted.
Now you should have a rooted and growing baby fig tree! 👏🎉
So that is it in a nutshell, I hope this method works as well for you as it does for me!
»» Please be sure to check out my rooting tips series to answer FAQs and also check out my post on Rooting Mixes.
🪴 Have you tried this and it worked for you? Let me know in the comments below!
Or


