


Got Eggshells? Make KNF Water Soluble Calcium
Why add water-soluble calcium to your grows? Let’s find out!


Ever have eggshells from cooking? What about shells left over from that oyster appetizer the other night? Or, what to do with those beef bones after making bone broth? Did you know they are an excellent source of calcium and minerals for your plants? A ready-made free calcium source instead of buying a separate product. I bet some of you answered, “Yes, I add them to my garden or compost all the time.” Well, if you put them in the ground around your plants they eventually will be an excellent source in say two to five years after the microbes break them down into something usable by plants. What about something quicker?
In comes Korean Natural Farming (KNF) Water Soluble Calcium. This is a quick and easy-to-make input that can be used as a foliar spray or soil drench. Why should we use this? Let’s read on…
Why is calcium important?
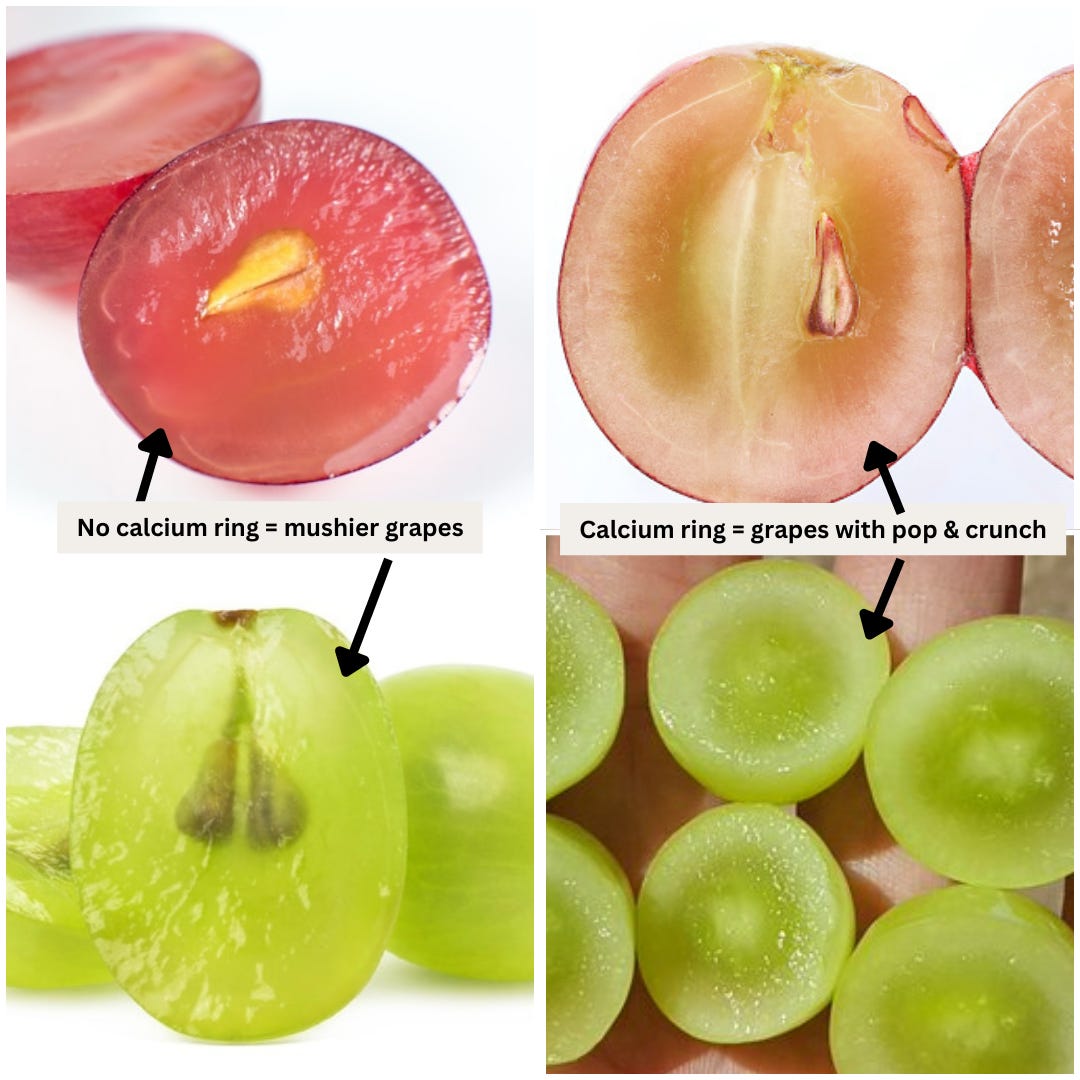
Calcium affects every aspect of a plant’s life: its growth and cellular strength, root development, nutrient transportation, reproduction, and defense system. Without calcium, plants would not have a strong physical structure and cells would not hold together properly. Because it is a cell wall strengthener, it also affects nutrient transportation to other plant tissues, it helps to provide the structure to make that transportation possible. It helps fruits to have high quality by assisting with plump and firm flesh and helps to prevent cracking in the skin. In fact, you can often notice a “calcium ring” of sorts in grapes or cherries which is one indicator of nutrient and fruit quality.
How about internodal spacing? If you focus on nitrogen, you can get a lot of quick growth which gives you larger spacing between nodes that is undesirable. Calcium, however, helps to give balanced nodal spacing. Focusing on calcium instead of nitrogen can give you better growth.
Calcium also plays a role in a plant’s immunity and defense response. It is one of the first to respond to emit signals to other parts of the plant when external stressors are detected. It triggers a cascade of events within a plant.
I love this short video clip that shows a calcium flush in response to a caterpillar biting the leaf at the arrow. 😀 Click play ↓
Video credit: https://www.science.org/doi/10.1126/science.aat7744
Isn’t that the coolest thing? (I watched it like 50 times typing this article, haha.) Systemic signals began immediately at the nibbling of an insect which set off a cascade of changes in calcium ion concentration as other leaves were notified that the one was under attack. Calcium is an essential aspect of a plant making sure its cell walls are strong against an opponent and in its signaling system. We see it in action in that video clip.
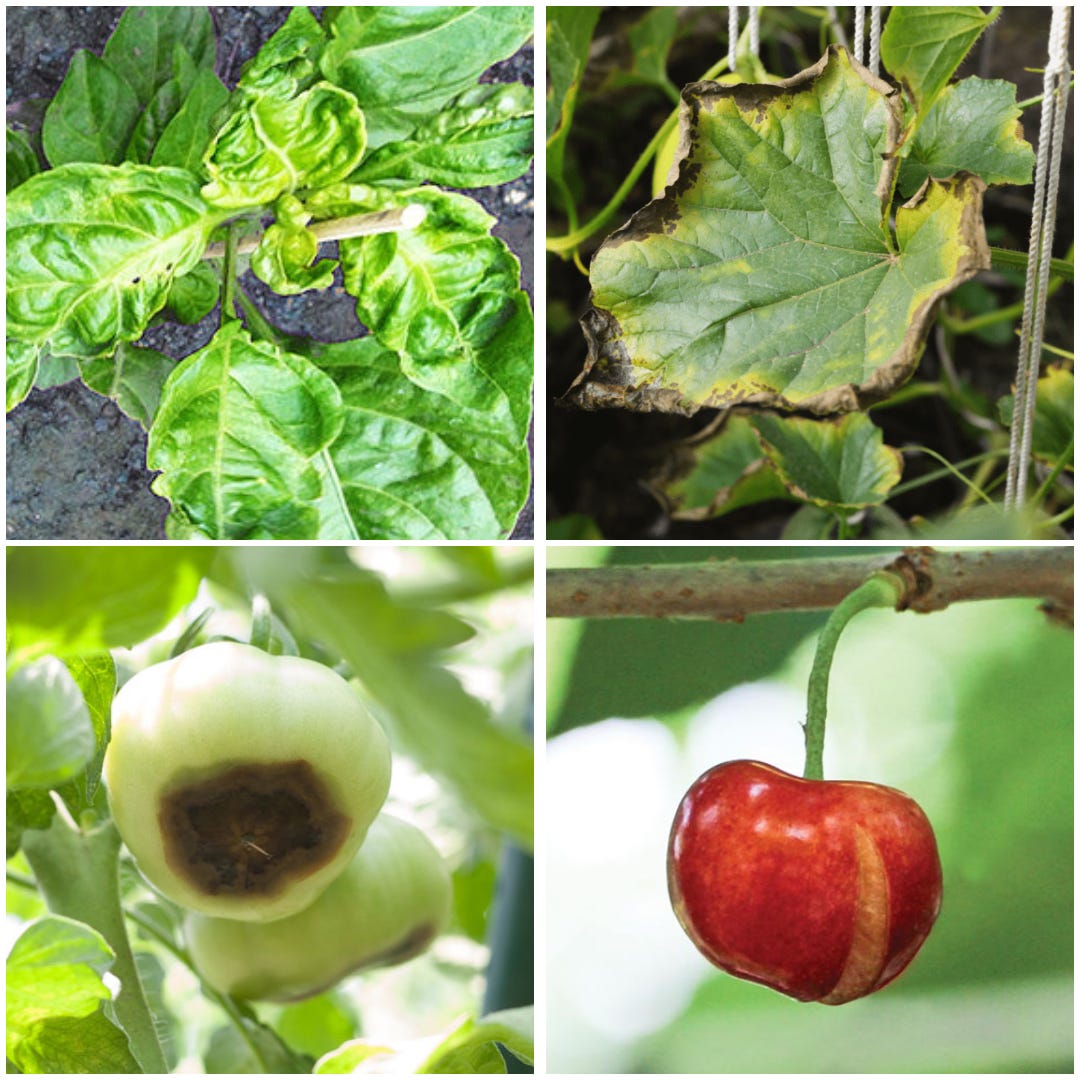
Calcium deficiency can show up as…
Deformed or malformed leaves.
Leaves that are crispy at edges or have brown spots, curl up, and turn gray before falling off.
Blossom end rot, especially noticeable on tomatoes or bell peppers.
Stunted growth.
Cracked fruit and certain fruit diseases.
These things occur because calcium is so involved in cellular strength and structure. Without enough calcium, new cells do not form properly, plants are smaller and less productive, and fruits are unable to build firm skin and flesh. Calcium is quite important as you can see.
How to add calcium…
You can add things like eggshells, bones, bone meal, bone biochar, or seashells to your garden or compost piles. These are great ways to add calcium that will benefit your plants after a few years as the microbes break them down into plant usable forms.
Bones can be high in phosphorus as well as calcium. So you may want to wait to apply any bone products to your plants, including the one below, closer to when you are wanting to slow vegetative growth and encourage fruiting.
Things like gypsum, lime calcium, or wood ashes can also add calcium to your soil. The caution is that some can alter pH quite a bit, so timing is important to avoid disturbing pH-sensitive plants too much. You may prefer to apply these in the fall before planting in the spring. Gypsum is fast acting and is the safest to apply with little effect to pH. The thing with gypsum is that it is also a source of sulfur, which is great if you need sulfur but not so much if you already have an excess of it.
But what about something faster? Like so fast it can have an immediate effect on plants as soon as it’s applied? Here we go, the time has come:
KNF Water Soluble Calcium!
This is one of the easiest inputs to make. You just need clean eggshells, seashells or beef/pig bones and vinegar. (Poultry bones are not recommended; any ruminant should be okay.) Put them together and let sit on a shelf for a week and you now have calcium acetate that can be foliar sprayed or soil drenched and is immediately absorbed by plants. It is that easy.
Are there particulars? Of course there are…
You want to make sure all organic matter has been removed from the shells or bones as this affects shelf life and how well the vinegar works on the material.
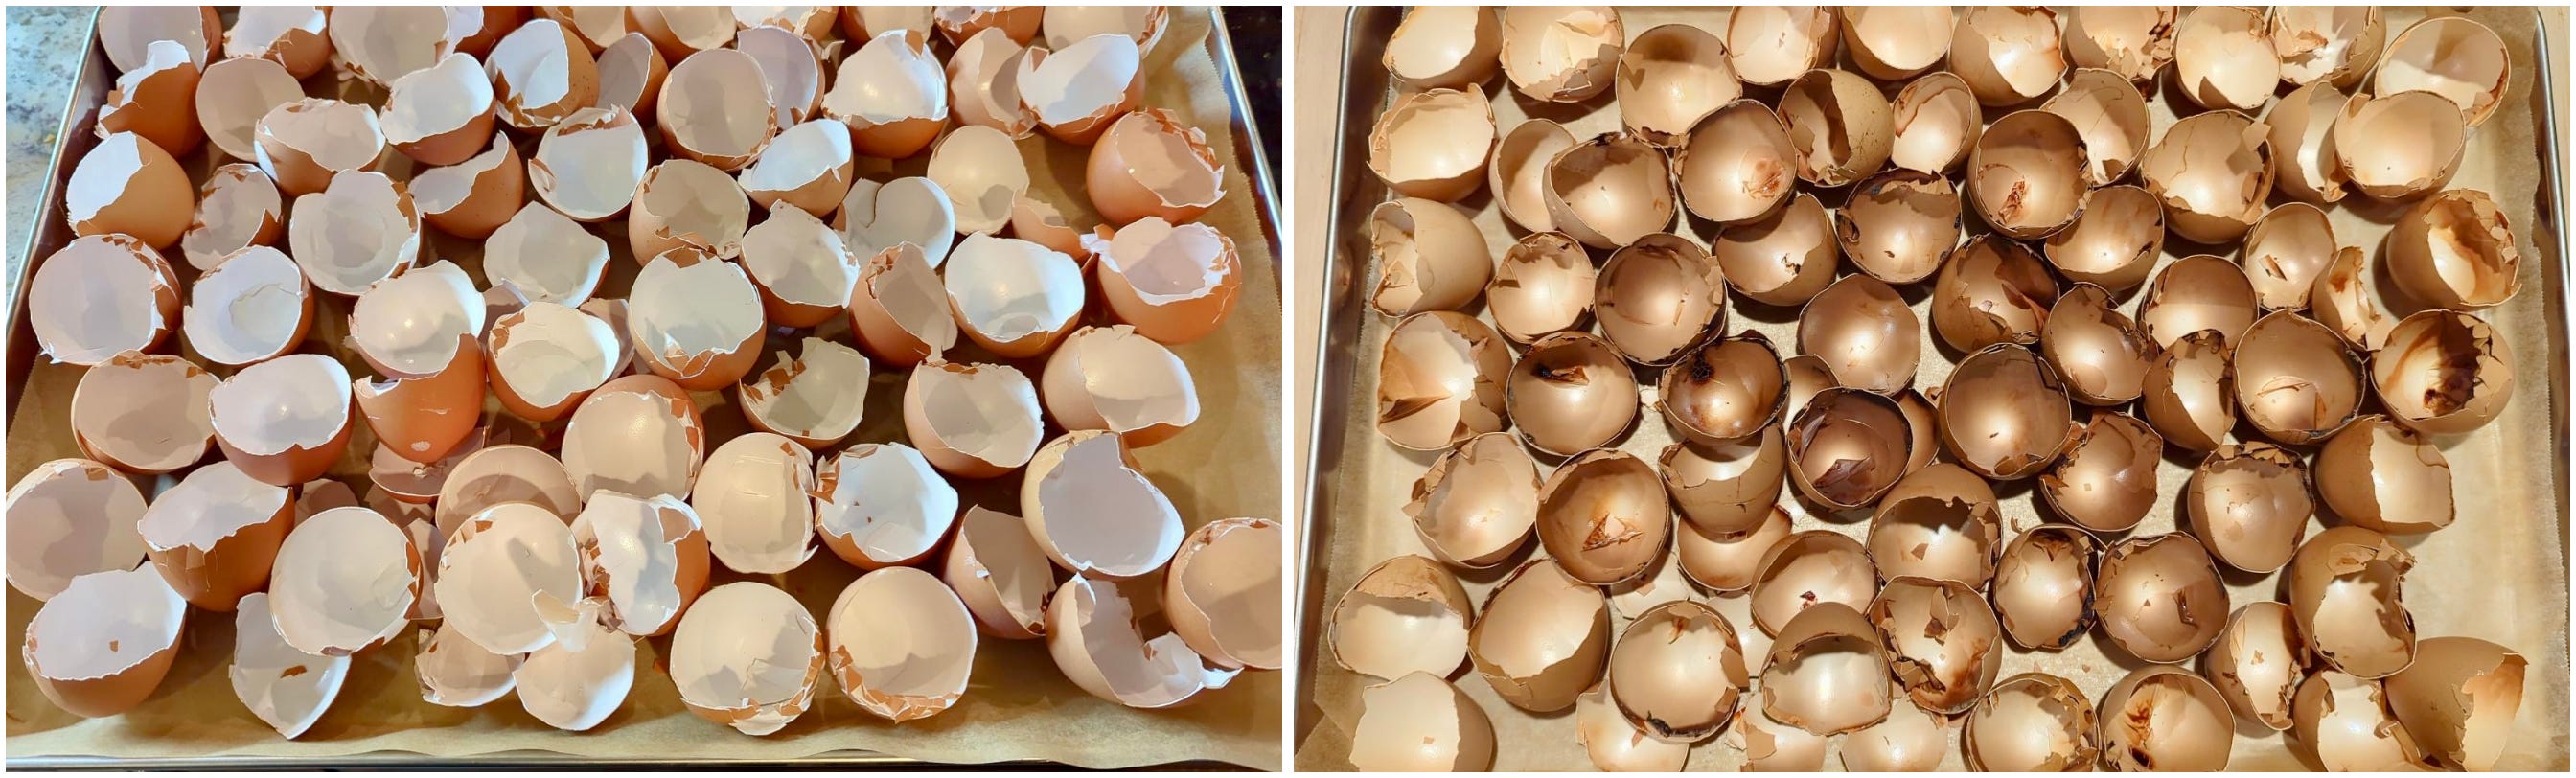
EGGS: Rinse off any egg white and bake eggshells until they turn brown inside. The point is to remove the inner membrane and to dry the eggshells thoroughly. You can remove the membrane on each eggshell by hand, but it is easier to cook it off when doing a lot at once. I put mine in the oven on a tray as the oven element is heating up to char the inside membrane then bake them at 350°F for about 30-45 minutes. (This can smell like burnt hair if the membrane burns but is not harmful to the extraction. It just is an unpleasant smell. I try to time entry to the oven so it doesn't burn but am not always successful with that. 🥴)
BONES or SEASHELLS: Boil bones or seashells so you can easily scrape off any fleshy bits and remove any fat on them. After boiling and scraping organic matter off, you can give bones a quick char on the barbeque to make sure all fat and flesh are gone. Cooking them will also dry them out and open pores so the vinegar can have more effect. Bone does burn and turn into bone biochar, so keep an eye on them so that they aren’t burnt through.
I usually break bones and shells into pieces with a hammer after all of the cooking as they are more brittle at this point. Oyster shells are my favorite, but other shells such as shrimp or clam work well too. The point is to use what is easy, accessible, and hopefully without additional cost.
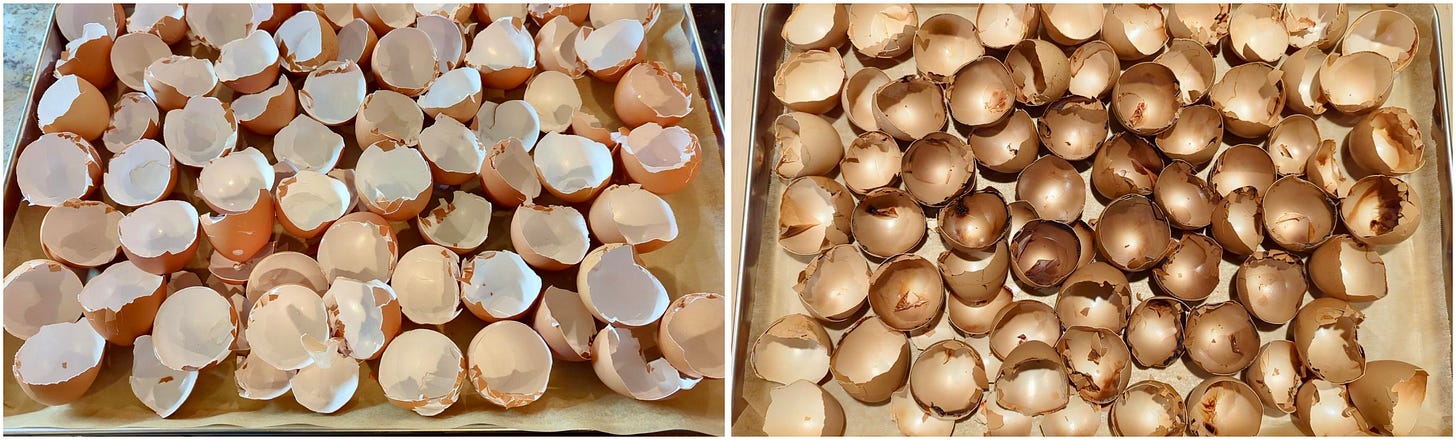
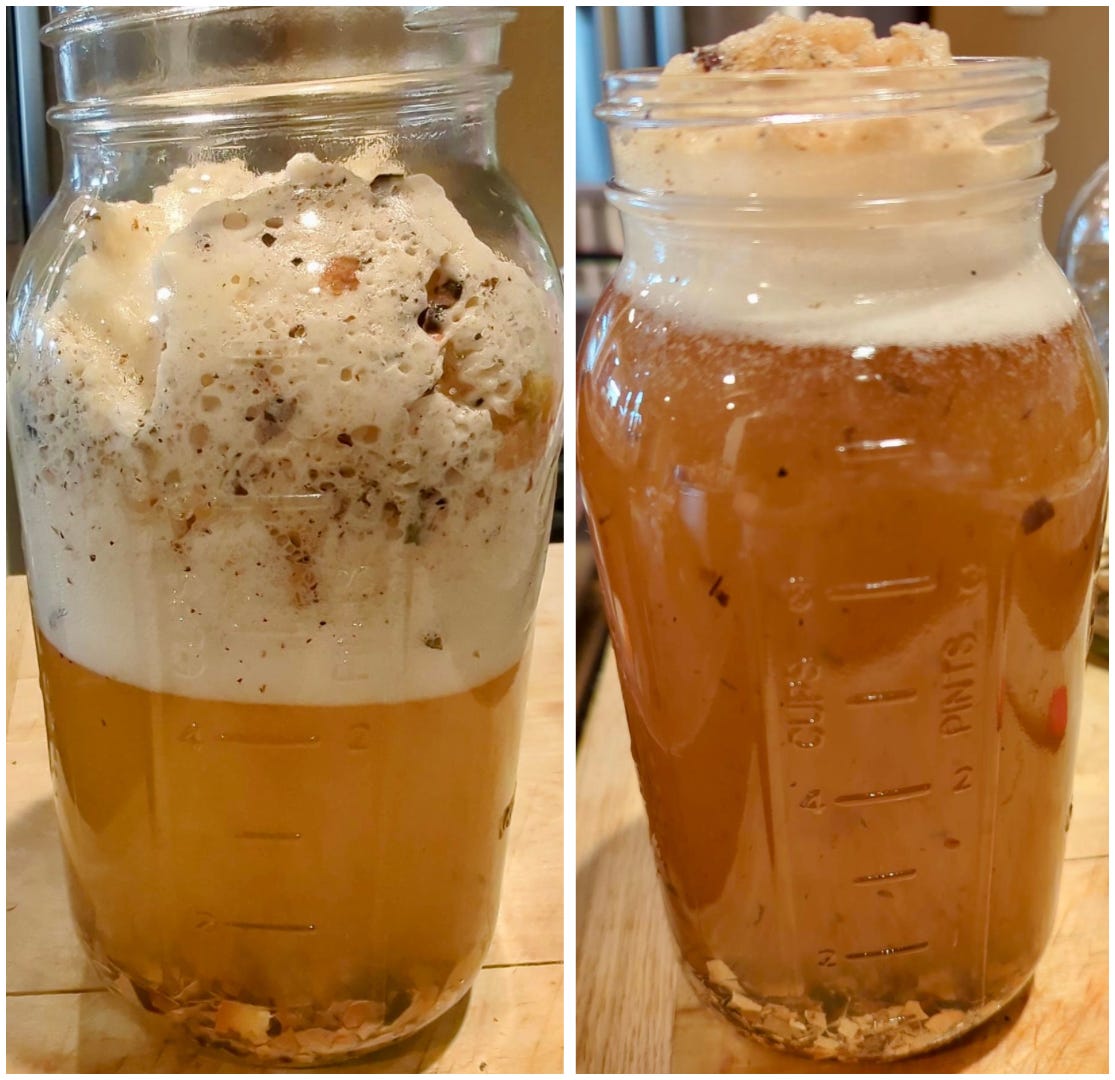
Eggshells before and after baking in the oven Break them into pieces and add to a large container. More surface area allows the vinegar to extract more minerals, so the smaller the pieces, the more extraction. However, powder is too small and is not recommended as it will give you a lot of particulate. Small pieces or chunks are sufficient and allow you to more easily strain them out, which is essential to not clog any sprayers or emitters.
A large container that allows head space is recommended as the vinegar will initially foam up when it is added, more so with eggshells than bone pieces.
Add in vinegar at a 10:1 ratio, 10 parts vinegar to 1 part shell or bone. You can use any edible vinegar that is at least 3% acetic acid. But I do recommend to give thought as to what it will put on your plants. For example, some cheap white vinegars may be made with GMO crops or have chemical residues from conventionally grown crops. KNF recommends brown rice vinegar as rice is local and common in Korea. For me, apple cider vinegar is common and more local to me. It also may contain traces of minerals or other compounds beneficial to fruit trees. So I use organic apple cider vinegar in my extractions.
Add in the vinegar slowly as it can foam up quite a bit at first. I usually add 1/3 to 1/2 of the vinegar, let it react, then add in the rest. Stir down any rising foam if needed.

Initial foam reaction with eggshells Let sit for about 7 to 10 days to fully extract. Cover the jar with a cloth or a paper towel and rubberband. You do not want a closed lid because of the gas exhange that is actively taking place. The extraction is complete when you no longer see fizzy bubbles coming off of the material when you move the jar. It is okay if you forget it and let it sit longer.
(Note that larger and thicker chunks of bone may take longer to extract and may not show as much activity because of less exposure to the minerals inside the pieces. These will need more time for the vinegar to penetrate and release minerals.)
Strain the liquid into a jar with a lid. If there is a lot of sediment, you may want to strain with an old t-shirt or cotton muslin. Otherwise a fine mesh strainer usually does the trick. This is shelf stable and can last for years. Don’t forget to label your jar with contents and date!
The remaining solids can be composted or sometimes put in for a second extraction, especially so with bone chunks. Materials are spent when they start to float. Just know that any secondary extractions will typically have fewer minerals than the first. Though interestingly, some secondary extractions of bones will actually be higher in other minerals. So combining all extractions of the same item together can actually give a more well-rounded end product.
Dilute at 500:1 or up to 1000:1. This can be used for foliar spray, a soil drench, or in fertigation. The vinegar is such a small amount and the pH is altered by the calcium in it so it does not harm plants. 500:1 is 1/2 tablespoon to one gallon of good water. 1000:1 is 3/4 teaspoon to one gallon of water. The amount used is based on plant need, age, and response.
How do we know this has any minerals in it?
That is a good question! One obvious way is that the plants react in a good manner to it and are healthy. This is the best measurement for whether to use any input. But we do have more information available to us that I’m excited to share with you.
Have you heard of Nigel Palmer? He is a really smart guy who has written an excellent book on making your own amendments based on KNF and JADAM called The Regenerative Grower's Guide to Garden Amendments: Using Locally Sourced Materials to Make Mineral and Biological Extracts and Ferments. I highly recommend his book! Anyhow, he had some of these extractions analyzed and has posted the information on his website, www.nigel-palmer.com, check it out to see more.
These were his results with the vinegar extractions he did, please click on the image if needed to zoom in on it:
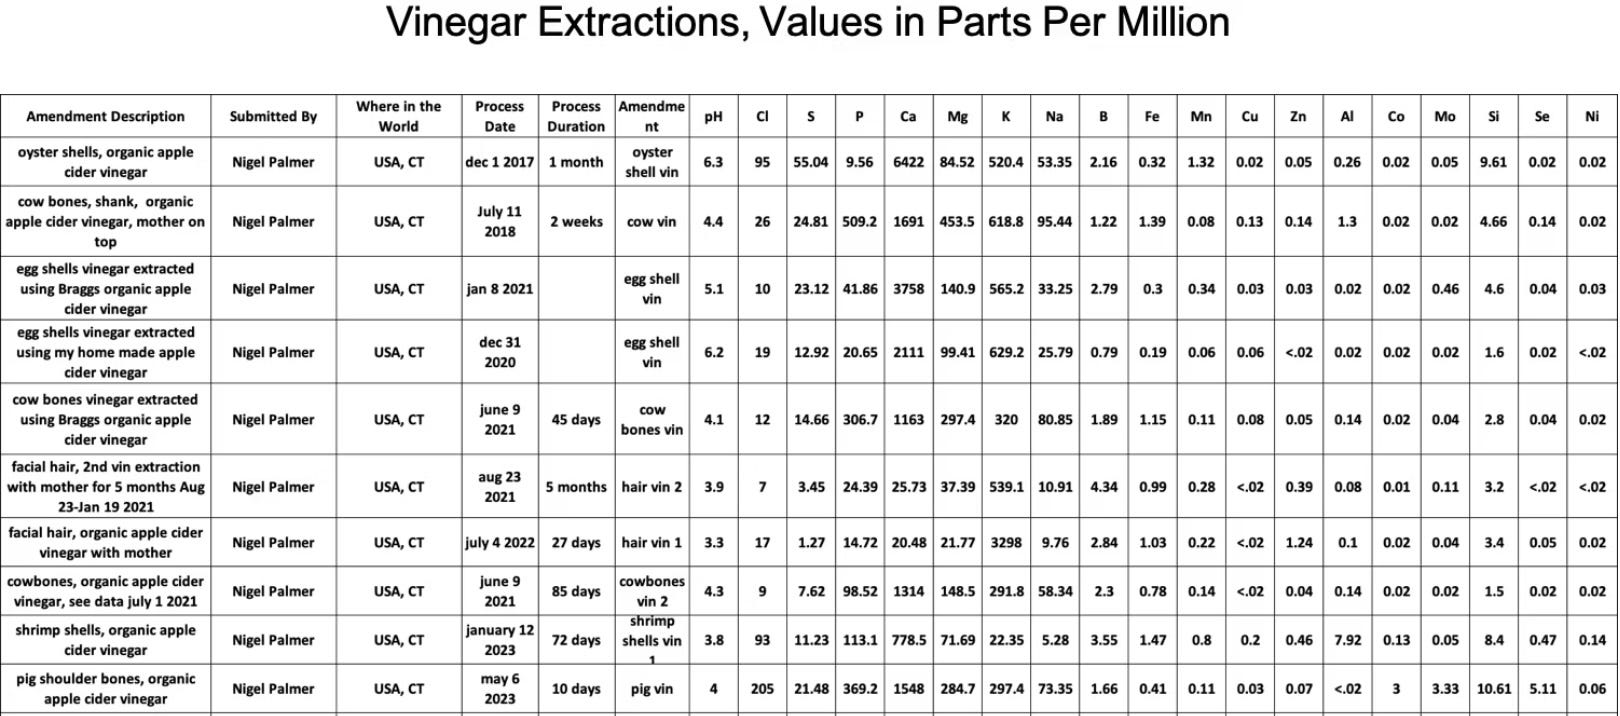
Look at all of those natural, plant ready minerals in there. It’s amazing! Of course, this is not a guaranteed analysis— this is what he got at that one time from the materials he used. What we get will vary from his just simply because our materials are sourced from different places, different animals with different feeds, and so on. But it is sufficient to give us an idea of the mineral composition of these ingredients and to customize application to plant needs. And if you would like your own extractions analyzed, he does have resources on his website for how to do that.
Some additional resources…
I’m linking these two YouTube videos because they give different ideas for cooking out the eggshells and may provide other helpful information to you.
So then, may your house effervesce with calcium-loaded bubbles this season! Mine is!
